Moira Yakova
3D Bow Card
This is the card I'd like to share with you for this week's Wednesday Wonder. It's not a card to send in the post, but one to give in person to a special someone. To make this card you will need:
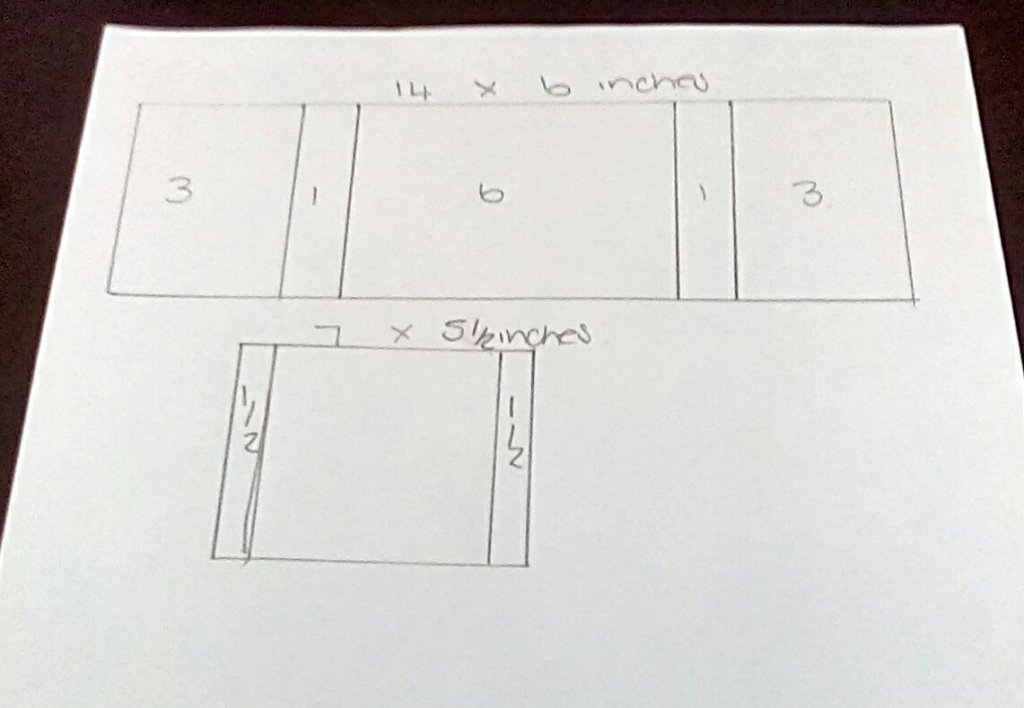
A card blank, mine is a 7 x 7" card because I wanted to add mats and layers, but the bow sits comfortably on a 6 x 6
3 different patterned papers, plus a base colour to make the bow itself
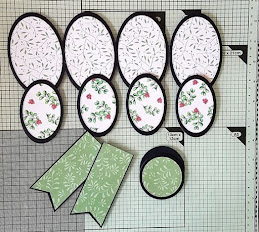
4 oval die cuts approx 4" long for the base of the bigger loops
4 oval die cuts approx 3.5 " long for the mat
4 oval die cuts approx 3.25 " long for the base of the smaller loops
4 oval die cuts approx 3" long for the mat
2 circles approx 2.25" of your base colour
1 circle approx 2" of patterned paper
I've found that 160 gsm weight is best for making the bow as it manipulates well and holds it's shape
A strong wet glue and/or red liner tape/tape pen plus some foam pads
1. Using wet glue adhere patterned paper to base paper ovals. Repeat with the bow "tails"and add patterned paper to one of your circles. The bow tails are 1.75"wide by 4" long, just cut a little V shape at the bottom.
2. Curve the ovals using a pencil or something which is cylindrical, the ovals should be rounded with no sharp fold.
3. Apply strong glue to the bottom edge of each oval and pinch them together. I used these small bulldog clips to hold the edges together until they dried, as they need to be secure before you start to assemble your bow. Other than that you can just hold them together until the glue dries.
4. Now it's time to put your bow together ! This is when you decide what you want to do with the centre of your card, you can either use a pretty topper or, as I have in this case, use a flower to finish the centre off. If you decide on a flower it should be the last thing to be attached to your card.
Using the smaller ovals first, apply glue to the bottom edge of the first oval and attach to the underside of your matted circle, the edge of the circle should just touch the patterned paper. Attach them close together as shown, first one side then the other.
5. When the glue has dried, attach the larger ovals centrally behind the smaller ones, again keeping them close together.
6. Using foam pads, attach your third circle to the base of your bow, positioning it directly over the circular topper.
Curve the "tails" slightly and adhere them to the base of the bow as shown. the bow is now complete.
7. Mat and layer your card base as you like, position the bow where you want it to be on the card front, and, using foam pads on the bottom circle of the bow, press down on the centre of the bow to adhere it to the card. Now you can attach your flower. This card can be a little "front heavy" and I find that if I'm using a square card base, it's better to have it stand tent style.
I have used different base shapes for this card, and my favourite shape for it is an octagonal base, though I have used circles and hexagons too. This is an octagonal one I made last year using the gorgeous Kanban Holly Hobbie Christmas Joy papers.
The pretty papers I used for today's card are also from a Kanban collection called Forest Friends.
I hope you've enjoyed reading this, and would absolutely love it if some of you gave it a go. Thank you so much for getting this far 💖


Fabulous Moira, great instructions for a beautiful card 💕
ReplyDeleteThanks Gail xx
DeleteGorgeous card. Thank you so much for the instructions. 😍
ReplyDeleteThank you Gill xx
DeleteBrilliant design, Moira. Thanks for the instructions. xx
ReplyDeleteThank you Liz and you're welcome xx
DeleteBeautiful and greateful for the instructions too. xxx
ReplyDeleteThank you Annie and you're welcome xx
ReplyDeleteWhat a beautiful blog you have Moira, I came here through Annie...
ReplyDeleteI'm going to follow you right away. Kind regards, Wilma xx
Thank you so very much for your very kind comment Wilma xx
DeleteAbsolutely beautiful card, and brilliant, clear instructions, thank you Moira. I'll definitely be giving this a try xx
ReplyDeleteThank you, I'm glad you found the instructions helpful, and have fun making your bow! xx
DeleteGreat card and instructions xx
ReplyDeleteThank you Yvonne xx
ReplyDelete