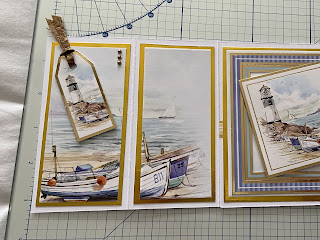
I got the inspiration for this card from a lovely card I received from Mary Kelly, and I would like to once again thank her for both her card and the inspiration for this card.
Items used
Hunkydory - You Light Up My world, toppers and 1 backing sheet
1 Sheet gold card
Santorum Gorjuss paper ribbon
Colours Unlimited adhesive pearls
1 5” x 5” pre-scored card blank
12.5cm x 12.5cm
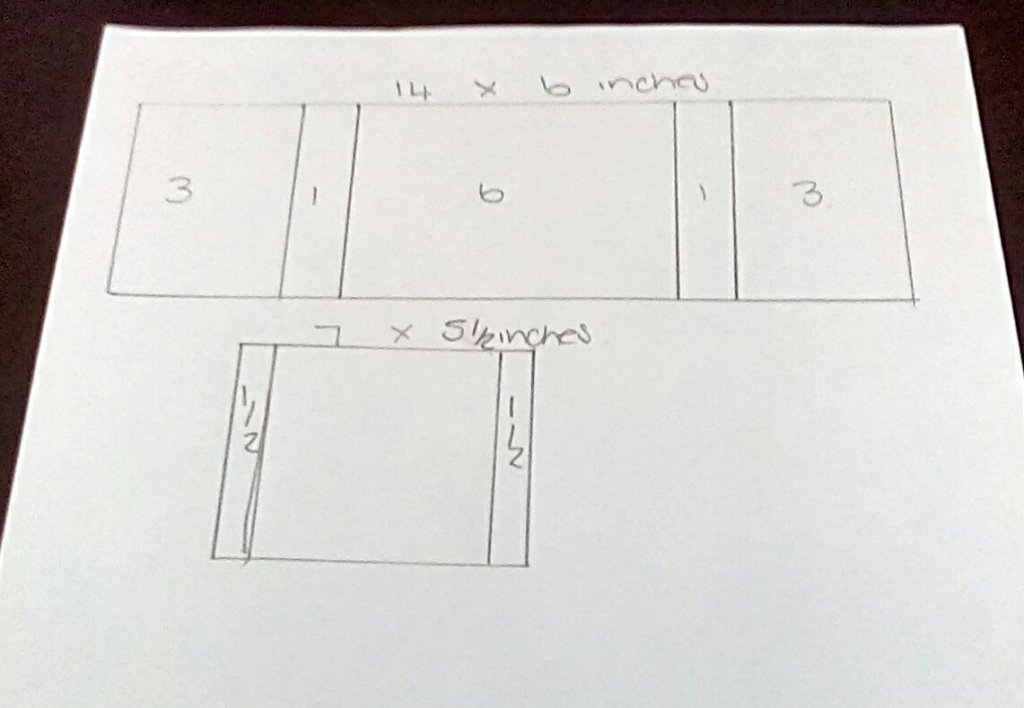
I extra strip of card 2” x 11”
5cm x 28cm
Double-sided tape
Wet glue
Foam pads (optional)
Score the strip of card at 2 1/2” and 6”
6.5cm and 15.2cm
Also, score the front of the card blank at 2 1/2”
6.5cm
Mats and layers used
Card front 2 1/4” x 4 3/4” and 2” x 4 1/2”
5.75cm x 12cm and 5cm x 11.5cm
Middle of card 4 3/4” square and 4 1/2” square
12cm square and 11.5cm square
Band front panel 1 3/4” x 2 1/2” and 1 5/8” x 2 1/4”
4.5cm x 6.3cm and 4cm x 5.7cm
Band middle panel 1 3/4” x 3 1/4” and 1 5/8” x 3”
4.5cm x 8.3 cm and 4cm x 7.7cm
Method
Attach the band of card to your card blank. I attached this onto the front of the inside of the card and slightly disguised this by adding ding a decorative band to my design, you could attach it this way or onto to the back of the card. I just preferred having a smooth back to the card to write on.
Make up your mats and layers and adhere to the relevant sections then just enjoy decorating your card how you wish.
I made two of the card front mats and layers so that I could also decorate the inside front panel, the Hunkydory card I used worked nicely like that, but it is entirely up to you how many panels you decorate, my card is now quite thick so will need either a larger envelope or a box for delivery.
I also used foam pads to raise the front tag, the inside topper and the birthday wishes sentiment.
Hope you like this card and have fun making it your own xx
Best Wishes
Julie


Love the card it’s stunning.
ReplyDeleteGreat card and thanks again. x
ReplyDeleteThis comment has been removed by the author.
ReplyDeleteGreat card and clear instructions, thanks Julie xx
ReplyDelete