Thursday 17 December 2020

CATHRYN WALKER - SCRAP BUSTING TAG IDEAS


Morning ladies, hope your all well.

Today I'm sharing a little scrap buster with you. I always hate to throw away bits of paper and off cuts and as I'm a big fan of layered flowers I find this is a brilliant way to use up these scraps for some beautiful flowers and leaves.

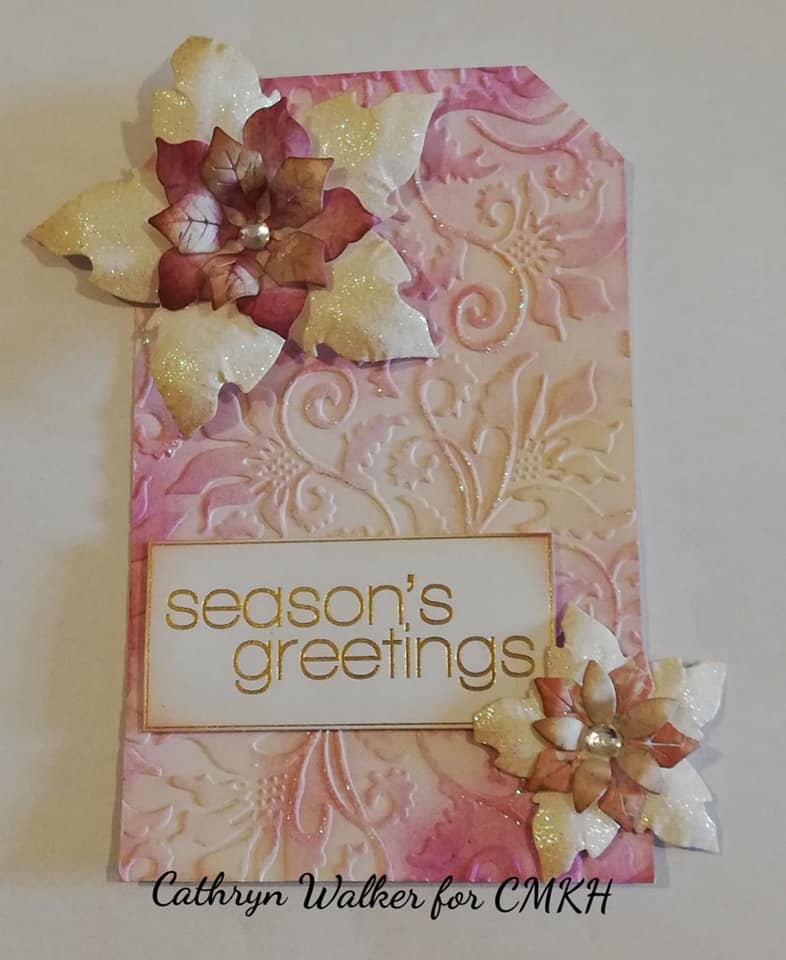
For my flowers I used a variety of dies in various sizes. I think these tags are super versatile and they also look gorgeous as toppers on cards or as an extra touch to pretty up a gift, or you can add string or bow to pop round a bottle.

Hope you like them, I'd love to see your makes so please do share your wonderful creations. Happy crafting Xx


You can cut tags by hand or use your own preferred cutting dies.

Run the tags through your embossing folders to add some interest and texture.


Add colours with your preferred inks.  Stencilling adds further interest.


Another good way to use your smaller scraps is to die cut out all flowers and storing them for upcoming projects.


It doesn't take long to build up all the elements for a project.


Tag number 1 - using Craftwork Cards papers 

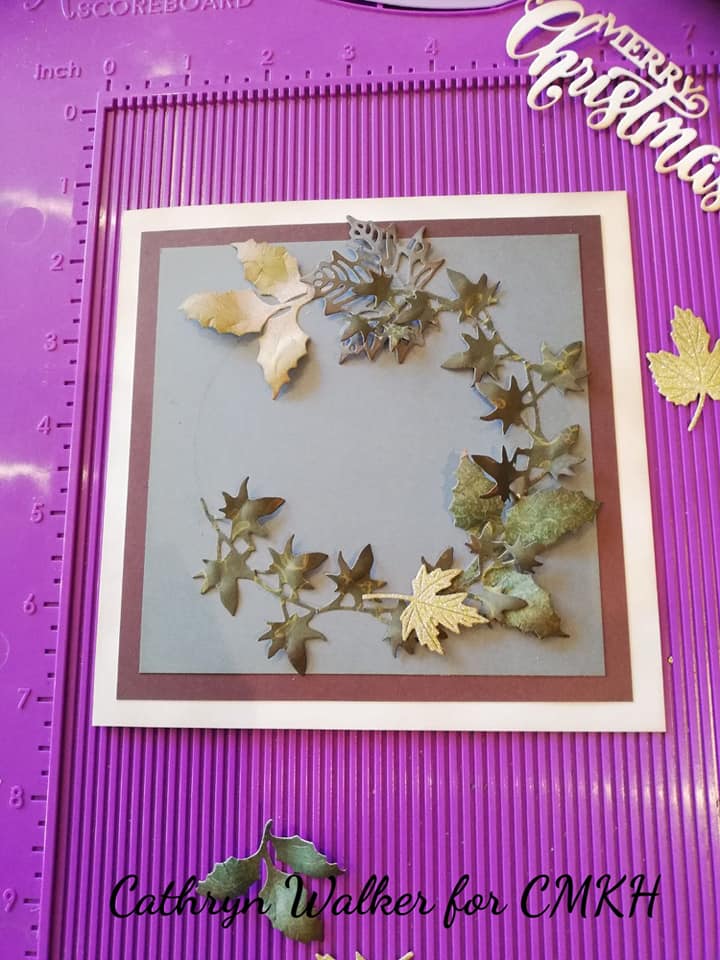
Tag number 2 with a touch of stencilling.


Add your tags as a central topper for your cards.


Experiment with different colours.


Who would have thought that you could make so much for a few left over scraps.


Happy Christmas - Happy Crafting
Love Cathryn xx


Monday 14 December 2020

BERNADETTE TAYLOR - CHOCOLATE HOLDER DECORATION - ADVENT DAY 14


There is also a detailed video of this project on our YouTube Channel

Happy Crafting - love- Bernadette 

https://youtu.be/acqShz_2Rjk

Saturday 12 December 2020

Monday 7 December 2020

CATHRYN WALKER - HOW TO CREATE A CHRISTMAS WREATH CARD


I hope you are all enjoying our crafty countdown.  Today I am sharing a wreath card with you all.  I just love this style and it works perfectly for Christmas but it is also super adaptable for other occasions too.


I have used a 6x6 card blank
a 5 1/2 x 5 1/2 mat 
and 1 5x5 mat


Firstly adhere the layers onto the card base.  
Then draw a feint circle on the top mat to use as a guide to build your wreath.  
Then die cut a selection of different size leaves in green and gold papers. 
Next shade the edge of the card and all your die cut elements with a chestnut brown ink pad.  
Curl and shape the leaves to give added dimension to the card.


Then build the wreath by working round the circle gluing down the leaves and building up layers so that they are overlapping each other until the wreath is filled out all the way round.


Finish off with a die cut sentiment and some gold glitter glue on the edges of the leaves to add a touch of extra sparkle.


I hope you enjoy creating a wreath card like this.  It would be lovely to see you share them on the group page.  Happy crafting

Cathryn xx


Wednesday 2 December 2020

WENDY JACKSON - How to use "peel offs" to make a background. DAY 2 OF ADVENT


Hi there everyone - this is my first stash busting tutorial.

If you are anything like me then you probably have a stash of peel offs squirrelled away....I've had mine since I first started making cards so probably around 25 years......

I don't tend to use them when I'm making my cards anymore but was reluctant to get rid of them so thought I would have a play and see if I could use them to create a background for a card.

I've decided to make a Christmas card for this project but the technique would work equally well with different peel offs for any occasion that you have in mind and in any colour scheme.


Here is a list of the supplies that I've used for this card.

A6 Card blank - Jade
White Super Smooth card
Selection of Peel offs - Im using lines, snowflakes and stars
Distress Ink - Wilted Violet, Tumbled Glass
WOW Super fine Embossing Powder - Opaque White
Posca Pen - White
Sugar and Spice Crafts Sequins - Unicorn
Cardboard packaging - or you could use craft foam, foam pads, 3D glue gel Stickle - Star Dust


Here is my detailed step by step showing how I created the card....there are some hints and helpful tips throughout the tutorial too !


Step1.


For my card blank I have started with an A4 piece of Jade card cut in half.
This gives two A5 pieces of card measuring approximately 8 1⁄4” x5 7⁄8” or 210mm x 148mm.

Each piece is then scored in half at 4 1⁄8 “ or 105 mm to create two card A6 card blanks.

Remember when you have scored your card this creates a valley, to get a nice crease in your card fold this into a mountain fold.

Next cut the panel of super smooth white card to approximately 4”x 5 3⁄4” or 100 mm x 144 mm this will leave a nice contrasting border around the background. You can use different types of card for this technique but I found that the super smooth card does not tear when you remove the peel offs. Set the card blanks to one side whilst you create the background piece..


Step 2.


Next secure the background card to a glass mat or to your work mat, this helps to keep everything lined up.

Use a set square to add the first diagonal peel off across the corner.

I like to use the edge of the set square and the lines on my glass mat to line it up.

You can of course do this by eye but I used to be an Engineer so it has to be right.....a touch OCD maybe ? ....probably why my cards take so long to make sometimes.


Continue to add the peel offs to create the design that you want on the background.

I’ve added the three stripes across the bottom corner of my design and randomly added snowflakes and stars.

Next for the fun bit - adding some colour !


Step 3.

I have used Distress Inks in Tumbled Glass and Wilted Violet.

I like this combination as it blends well together and gives a wintery feel - perfect for a snowy Christmas card.


Obviously there are lots of other colour combinations that you could try...my other favourite more vibrant combination is Picked Raspberry and Squeezed Lemonade I first added Tumbled Glass using a foam blending tool to blend the ink in small circles across the whole piece but you can use whatever type of applicator you like to use to give a smooth finish.

Remember to turn your piece of card around to make it easier to
blend your ink and blend gently over the peel offs so they don't lift off the card before you are finished.


It doesn't have to be a perfectly blended application of colour as this is just the first step.

Next I added Wilted Violet around the outside of the piece in the same way taking care when you blend over the peel offs around the edge.


Step 4.

Next add some extra detail to the piece by gently splashing or flicking water over it. Add as much or as little as you like to get the effect that you want.


Allow the water to sit on the card for a minute and then mop up any excess with a clean tissue or kitchen roll. This will lift off some of the distress ink.

This technique is often called faux bleaching.

Allow the card to dry naturally before moving on - if you use a heat gun at this point it may cause the peel offs to lift off the card.


Step 5. 


Once the card has dried use a white Posca pen to add splashes of paint over the background.

I gently tap the pen with a ruler to do this again adding as much white as you want.

You can also use acrylic paint but depending on the thickness of the paint you may need to add a little water to be able to flick or splash it on to the background.

Be prepared as the paint splashes generally make a mess so remember to protect your work surface.

Leave the background to one side to dry.


Step 6.


Once the paint has dried very carefully remove the peel offs to reveal the design.

A craft knife may help do this if you don't have any fingernails.

If you are careful you can generally use the same peel offs for 3 or 4 cards before they need throwing away.


Step 7.


Next you will cut a diagonal line across the card, towards the bottom, using a craft knife, guillotine or paper trimmer.

Use the diagonal lines at the bottom right hand corner of the card as a guide to make sure that the cut is parallel.


Step 8.


The next step is to stamp the sentiment onto the card blank.

Line up the smaller bottom section of the background panel on the card blank and use this as a guide to position the stamp.

When you are happy with the position, carefully transfer this to a stamping platform if you have one and pick up the stamp with the lid of the platform as normal. You can also stamp the sentiment using an acrylic block.


For this design I chose to use a white embossing powder. Remember to use an anti static bag to rub over the card blank before applying the embossing ink.

Apply a sticky embossing ink to the stamp and then stamp onto the card blank.

Next apply the embossing powder, remove any stray flecks of powder before heat setting.

Remember to make sure the heat gun is hot before using it and apply heat to the underneath of the card, this will give a smoother finish to the embossing.


Step 9.


Once the embossing has cooled the card can be assembled.

We want to create an aperture, so the top panel of the background piece will need to be trimmed to fit the card blank .

The amount that you need to trim off will depend on the width of the panel that you need to allow the sentiment to show.

Line up the top and bottom panels on the card blank and trim to size so that you have the same border around the card.


Step 10.


I wanted the background panels to be raised off the card so I adhered pieces of cardboard to the back before sticking to my card.

I like to reuse and upcycle and packaging is perfect for this.

You could use craft foam, foam pads or 3D glue gel to get the same effect.


Step 11.

Adhere the panels to the card and then finish off with sequins and glitter glue. Here is the finished card.


I really hope that you like this idea and look forward to seeing your creations - please share them in our Facebook Group - Creative Minds Kind Hearts.


Love and Crafty Hugs Wendy x


I

#weeklypromptfloraandfauna   You will need… Cardstock Tape/glue Patterned paper Complimentary dies/die cuts. Make your card with me … Cut yo...