


Hello crafters!
Today I’ve prepared an extremely easy way to make a Bay Window card that fits into an envelope for a 5x7 card. It’s so easy that by the end you’ll be wondering why you even needed a tutorial!
There are lots of videos and tutorials for making this type of card, but most of them use US envelope sizes, which are a bit more difficult for us to source here in the UK. Those of you who live elsewhere, you might choose to change the dimensions and folds to fit other envelope sizes.
Whatever size you make, this card style is full of impact, yet it folds completely flat for posting. Win-win!
First of all, you need a 5x7 card blank. Cut along the fold mark to create two pieces of 5x7 cards. Alternatively, you can just cut two pieces of 5x7 card.
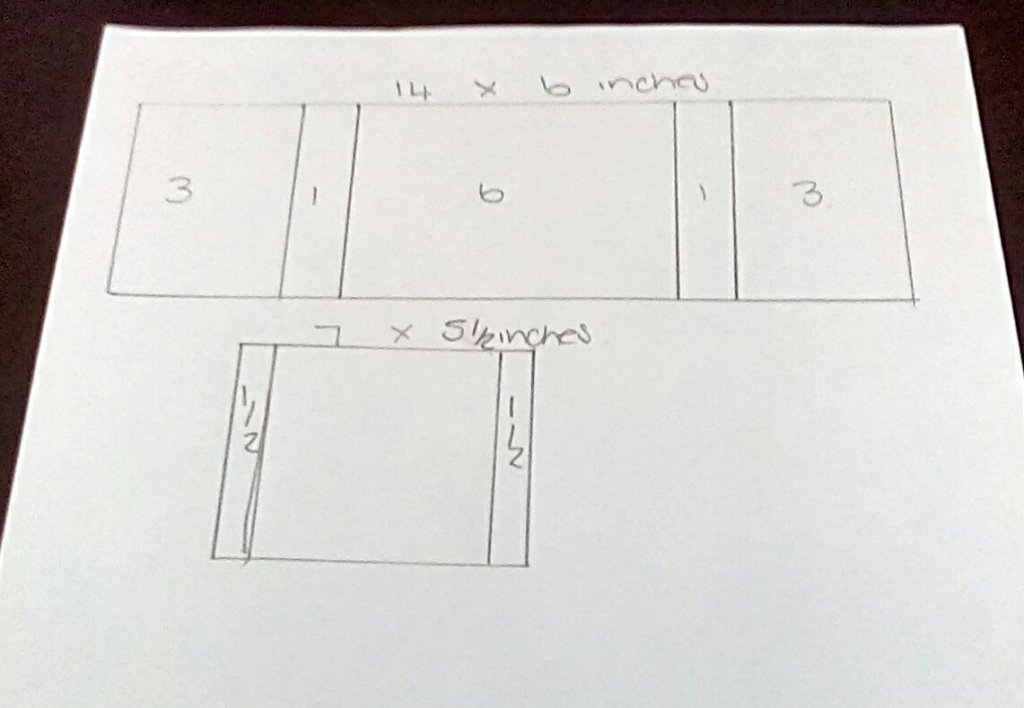
Take one of those pieces and score at ½”, 2¼”, 4¼”, 6” and cut at 6½.
The first and last are valley folds, the others are mountain folds. You should now have something that looks like this:

Now it’s easier to add mats and layers to the card before you join the two parts together.
Here I’ve used papers from CWC Cottage Garden to create a vista as if I were looking out through the bay window.

I’ve cut a strip of the paper 4¾” wide and then strips from the left in order as follows:
⅜” for the left-hand spine/flap
1¾” for the left side panel of the window
1¾” for the central window panel
1¾” for the right-side panel of the window
⅜” for the right-hand spine/flap
1 x 1⅜” for the back piece.
Make sure you stick them down in the right order!
The next stage is to stick the two pieces of card together along the left-hand edge. I’ve used double-sided tape for this, being very careful to line up my edges perfectly first.

Finally, I’ve used butterflies to create the tab which holds the window in its open position, with two extra little butterflies for decoration.


This time I’ve used an old kit from Hunkydory, mat and layered the papers first with Silver mirri, and used a sentiment as the tab which keeps the window in the open position. I decorated the “inside” as well as the card front, using a die-cut square of white for the writing space.
I do hope you will give this card style a go – it’s so easy but makes a great impact.
I’m so looking forward to seeing all your makes.
Karen


wonderful card and so easy to follow these instructions. I will definitely be making one of these cards, Karen x
ReplyDeleteLooks wonderful and I have just cut mine but does it fold into an envelope? xx
ReplyDeleteFollowing you too.
Hi there, the right hand side of the bay window section isn't adhered to the back panel, it simply tucks under so the card can be un-tucked and then its flat to go into the envelope. Hope this helps x
DeleteThanks Wendy I realized that this morning after putting it together and seeing it on another blogging buddie's blog, https://crafty-lizc.blogspot.com/ which is where I found the link to this...love the end result.
DeleteLove your blog and look forward to more creativity here... BTW Instructions were great, I actually have it now all ready for future use on my silhouette cameo...