Wednesday 30 November 2022

NOVEMBER BLOG POST - ROUNDUP OF THIS MONTH'S PROJECTS AND ACTIVITIES


Gail Mands Anniversary Card


On 10th November, our group Creative Minds Kind Hearts celebrated its 5th Anniversary.  As many of you know,  Elisabeth helped to run the popular Craftwork Cards Fan Page and the first version of CMKH.  CWC was purely for sharing our love of Craftwork Card products and CMKH was for sharing other companies' products.  When Craftwork Cards sadly closed down: CMKH took over and here we are 5 years on.  Many of the original members have been with us from the beginning and often remark that the members are more like friends to one another.  During Lockdown, the group was a lifeline for many.  Life has returned to new normality and CMKH is still evolving to meet the crafting needs of its members.

CMKH does take up time to run by Elisabeth, Gail, and all the Group Experts.  We work hard to keep it drama free and interesting for crafters of all abilities.  Please take the time to like posts and photos.  Better still, leave a comment. The more people engage with comments or sharing photos, the easier it makes our roles and help the group to develop,  


A good variety of cards have been shared during November by; Donna Cleary, Elaine Wheatley, Karen Watling, and Lesley Chambers.


Other members have been sharing a few of their Christmas cards: both on the main page and in the Christmas Card A Long Album.  Thank you to the following ladies for sharing their festive makes:

Sheila Bubb, Angela Stinchcombe. Chris Crouch, Christine Price, Helen Bullock, Jane Austen Dyer, Julie Dawson, Mary Blackhurst Hill, Mary Kelly and Sandra Robinson.


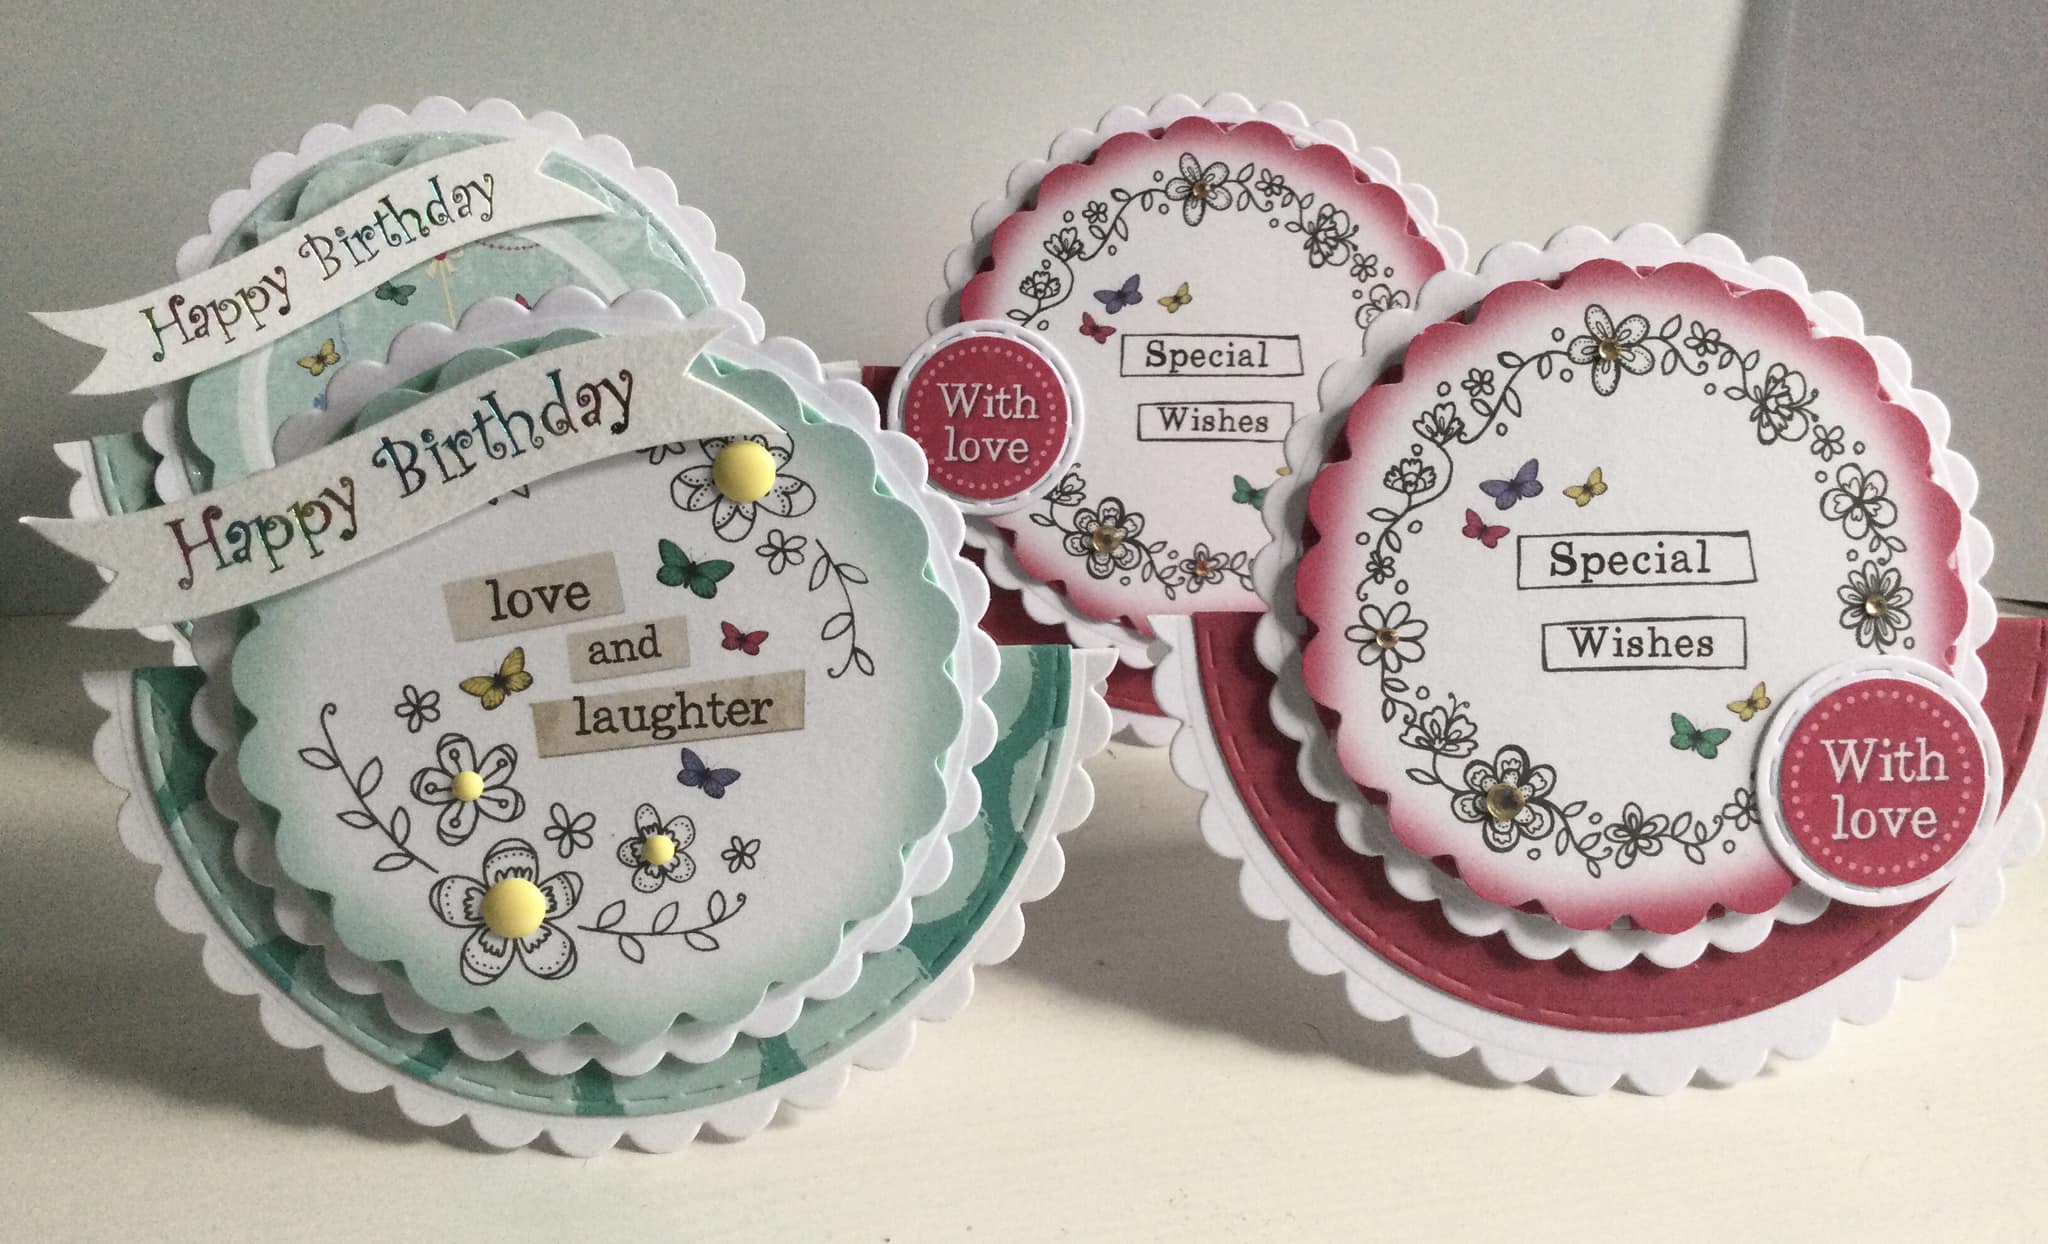
Also worth special mentions are these three stamped cards.  All with their own unique style and beautifully created by Gill Harrop, Janet Roberts, and Natasja Boseker.


Every Monday, the Mixed-Up Crafters have shown many wonderful finished projects including Festive Crackers from Christine and Elaine Thomson Smith.  


After 139 days of stitching.  Tracy Shephard's masterpiece is finally complete.


Karen Williams created some brilliant 12x12 Gift Bags


Karen Shaw shared her latest arty pieces, created with acrylic paints and "Tracy Easson" stamps.


It is Christmas Craft Fair season and two ladies - Gail Mands and Caroline Pattenden shared photos of their festive stalls.  Both of them had successful events which makes all the effort worthwhile.


Did you write up your list of sales and expenses in the CMKH Craft Planner?

Finally, on the 26th of November, we pulled together a 5th Anniversary Event to showcase ten different projects- created by the Group Experts and our Crafting Friends.  Once again, thank you to Liz Cavill, Cathryn Walker, Caroline Pattenden, Angela Stinchcombe, Tracy Shephard, Karen Watling, Heidi Hobson, Sandra Robinson, Lesley Kilby, and Natasja Boseker for supporting the event and taking the time to create the video tutorials and blog posts.

The videos are on our YouTube channel and the blog posts can be found by scrolling down this page.


November has been a busy and creative month.  It would be great to see your versions of all the inspiration that has been shared.  If you are unsure of how to upload photos then please contact the Admin team who are happy to help.  If you haven't shared your work before - try posting a project before the end of 2022.

The One Sheet Wonder Album is open for entries,  Full details are saved in the album, and videos to help you are on our channel.  By entering your One Sheet Wonder - you could win a brand new set of Graphic 45 Papers called Cafe Parisian.  Entries must be in the album by the 5th of January 2023.


Another reminder.  There will NOT be a Happy Post list for December because many of you share Christmas cards within the group.  In addition, postal strikes will make it difficult to guarantee cards will arrive within the time frame.  If you know of anyone who is feeling low/lonely/unlikely to receive a card - please do let the admin team know.

Last year, Elisabeth created a Craft Planner specifically for Creative Minds Kind Hearts.  It included birthdays, group challenges, crafting tips, a  card list, and much more.  If there is enough interest and costs can be covered then it is possible a 2023 version can be developed and printed.  Please comment to show your interest.  Currently, five people have asked about the Planner but this will not be enough to make a print run.

I hope you have enjoyed this monthly round-up of the group's activities.  Please comment and share your thoughts.

Be Creative - Be Kind - Be You.

Love Elisabeth xx

If you are still on the look out for inspiration and have just started your Christmas card making then watch "25 Days of Christmas Card Making". There really is something for everyone!

https://youtube.com/playlist?list=PLaxaWXYHU8kdzKhOM-H1CY2NOKyHyele8


ANGELA STINCHCOMBE - POP UP BLOCK CARD


In November, Angela shared her version of a Pop-Up Box Card.  Here are her card and written instructions.


Saturday 26 November 2022

5TH ANNIVERSARY EVENT - Tracy Shephard shows how to create a Flower Terrarium Gift/Card


Hello, everyone.

Today I am going to show you how to make a 'terrarium card'. I admit it is more of a gift than a card, but once again you can vary it to suit your own style and occasion.


You will need.

white cardstock

acetate

red liner tape.

design paper of your choice.

a mix of flower die cuts, leaves, etc.

sentiment stamp.

  1. Cut a piece of card stock 6 x 6 and score each side at 1 inch. The idea is to make a box base.

2. Cut each corner as shown in the picture below. Fold and burnish all score lines and then glue the tabs to the inside of the box sides.

This base is now 4 x 4.

3. Cut a design paper piece 4 3/4 x 4 3/4. I rounded my corner with a corner punch. Glue this to your base.

4. Cut two pieces of acetate 4 x 6. You can have this longer if you wish. It will make your terrarium taller. Score one end of both pieces at 1/4 inch. Red liner tape one of the pieces on the score line edge.

5. Stick the two scored edges together.

6. Cut two pieces of design paper 3/4 inch x 12 and attach these pieces to the edges of your acetate using red liner tape. Trim off any extra.

7. Cut a piece of white card stock 3 x 6 1/4. Score at 1 1/2, 3, 4 1/2, and 6.

Cut a second piece of white card stock 2 x 4 1/4. Score at 1, 2, 3, 4,

Fold and burnish each score line, Attach tape to the 1/4 inch piece of each size and stick to the other side to make a block.

8. Cut a decorative piece, 1 inch x 1 3/4 and glue this to the smaller piece front.

Glue the two blocks together. and glue these to the base.

Look at the joins of each block and ensure they are facing each other, This means the joins will not be seen.

9. (you might want to do step 10 then step 9 at this point. I found it easier this way.)

Using red liner tape stick the acetate to the edge of the base, making sure the blocks are facing front way.

10. Now the fun part of decorating your blocks. I inked some white die-cut flowers and arranged them with leaves and smaller flowers,

I covered the acetate edge with coloured card stock and added a sentiment on a ribbon. I used a small hole punch to attach it to the top of the terrarium.

Here is a festive terrarium that has been made in exactly the same way


I hope you have fun making this gift, and as usual, tag me on social media with your finished creations.

Enjoy the rest of the 5th Anniversary Event
Love Tracy xx


5TH ANNIVERSARY EVENT - Liz Cavill shows how to create a Joy Fold Card


 The first fancy fold card I made many years ago, when I'd only ever made single fold cards, was a Joy Fold card.  I've made many cards using this fold over the years for all different sorts of occasions and it's a really easy card to make.  Here are the instructions for how I make mine.  My finished card measures 7" x 5" when folded.  I used papers from a 'Classic Christmas' 12 x 12 paper pad from The Works.  The reindeer is a Memory Box 'Leaping Deer' die cut.

1. Start with an A4 sheet of card.  Cut at 5" down the length of the card.  The largest piece will be your base card.  
 

 2. Score this piece at 7" and fold along the scoreline.  Save the narrower piece for later.

3. Cut one mat 1/4" smaller than the front panel and one mat 1/4" smaller than the inside back panel. Cut two contrasting pieces of patterned paper 1/4" smaller than the mats.
 

4. Attach the layered patterned paper to the card as shown in the photo.
 

5. Make the topper for the front of your card.  I've used a die cut and gems for mine and it measures 3" x 3", but you could use a ready made topper or a stamped image or sentiment.
 

6. Trim the width of the leftover strip of card to 1/4" wider than the height of the topper.  If it's not wide enough, you will need to cut a new strip from a second piece of A4 card.  The scoring on the strip of card depends on how wide your topper is.  As my layered topper was 3" wide, I scored at 3 1/4" to allow a small white border.  Attach the topper to the strip ensuring that the fold is on the right hand side.

7. Keep this card folded and cut off the end so that when folded it measures 5" long.


8. Add a layered piece of white card as shown, this will be where the message will be written. I've attached a punched Christmas tree for added interest. 
 

9. Attach the smaller card inside the larger one.  I've put mine right in the middle, but move it slightly left or right to see which position looks best when the card is closed.

10.  A sentiment can be added to the front.  I like to be able to keep my card closed, so I use a brad to do this.  When the card is closed, put a pencil mark on the card front, just to the left of bottom left-hand corner of the topper. Make a small hole just through the card front, through the pencil mark.  This can be done with a paper piercer, but I find it easier to use a punch which makes a very small hole.  Push the brad through the card front and secure it. (Depending on the thickness of the brad, the card may need a large letter stamp if posted.)

11. The bottom corner of the topper should just slip in behind the brad.


The card can be easily opened to be displayed.


#weeklypromptfloraandfauna   You will need… Cardstock Tape/glue Patterned paper Complimentary dies/die cuts. Make your card with me … Cut yo...