WW Summer of Folds No. 46: Double tag book fold
Hello again,
To make this card you will need the following (all measurements are in inches):
Base layer (x1) | 5 ½ x 11 ¼ | Matts (x4)* Patterned paper (x4)* | 5 ¼ x 5 ¼ 5 x 5 |
Front strip (x1) | 2 ½ x 11 ¼ | Matts (x4) Patterned paper (x4) | 2 ½ x 2 ¼ 2 ¼ x 2 |
Pocket (x1) | 5 x 5 Cut in half diagonally | ||
Spine (x1) | 5 ¼ x ¼ | ||
Tags (x2) & ribbon |
*If using the patterned card for cover (as in the example) you will only need 2 matts & 2 patterned paper for the internal faces.
The base & front strip can be cut from a single A4 sheet. I have used Hunkydory Adorable Scorable® “Hedgehog Hugs”. The finished card measures 5 ½ x 5 ½ and fits a standard 6 x 6 envelope, however, it will need to be weighed at the Post Office as it does not fit through the size guide to go as standard mail.
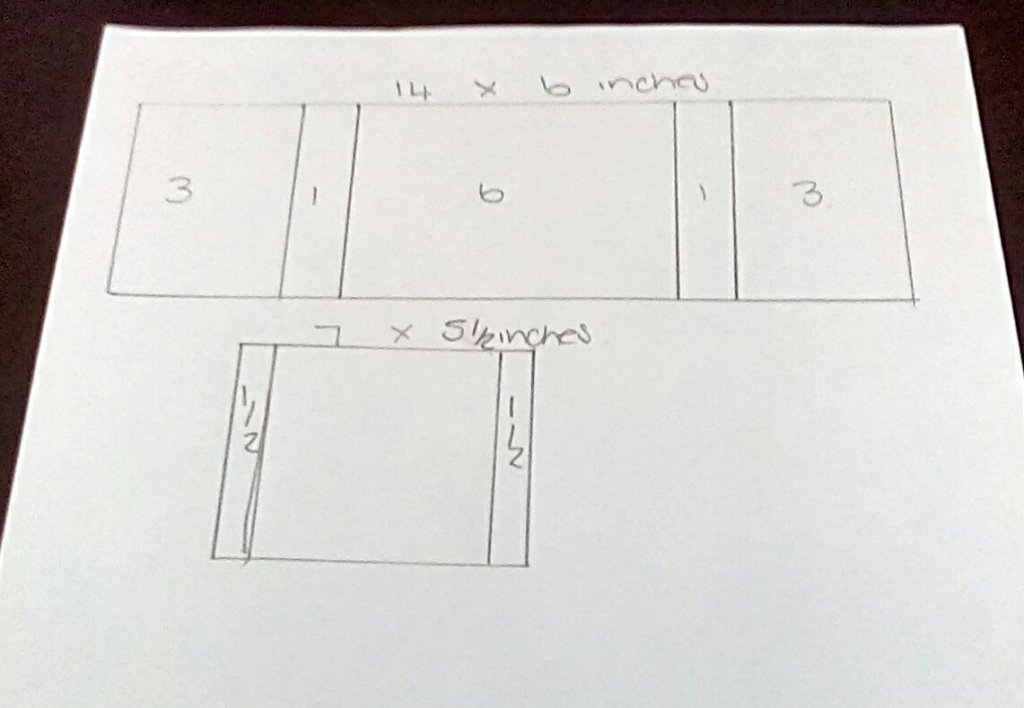
Pattern for sizes & folds
Step 1: Base
Create the base layer by scoring at 5 ½ & 5 ¾ on the long edge (this creates the spine) – both are valley folds. Burnish well. Add matts & paper of choice, including the internal spine.
Step 2: Front strip
Create the front strip by scoring every 2 ¾ on the long edge creating 4 identical areas – fold valley/mountain/valley for concertina effect (see photo above). Burnish well. Add matts & decorate
Matts/decorations in place.
Step 3: Pockets & tags
Add pockets to the base as shown below by only taping the 2 straight edges.
Create tags of an appropriate size to fit the pockets.
Attach the front strip to the base by taping only the 1st and last panels to the base card, ensuring all edges line up (to give you wriggle time add wet glue to your tape before placing).
Step 4: Decorate the front &/or back as appropriate. The finished card should look like the pictures below
front cover
View from above (minus tags)
Angela Stinchcombe
27/05/22


I love this fold and the papers used. It looks quite easy to make using the clear instructions and diagrams, thanks Angela. I'll have a go, and post my card in the Creative Minds Kind Hearts group x
ReplyDelete