


Corner Bookmarks
Corner bookmarks are so easy and fun to make and are a good way of using up odd scraps of card and patterned paper.

The bookmarks slip over the corner
of the page to keep your place. I decorated
this one with inks, stamps and a die cut.
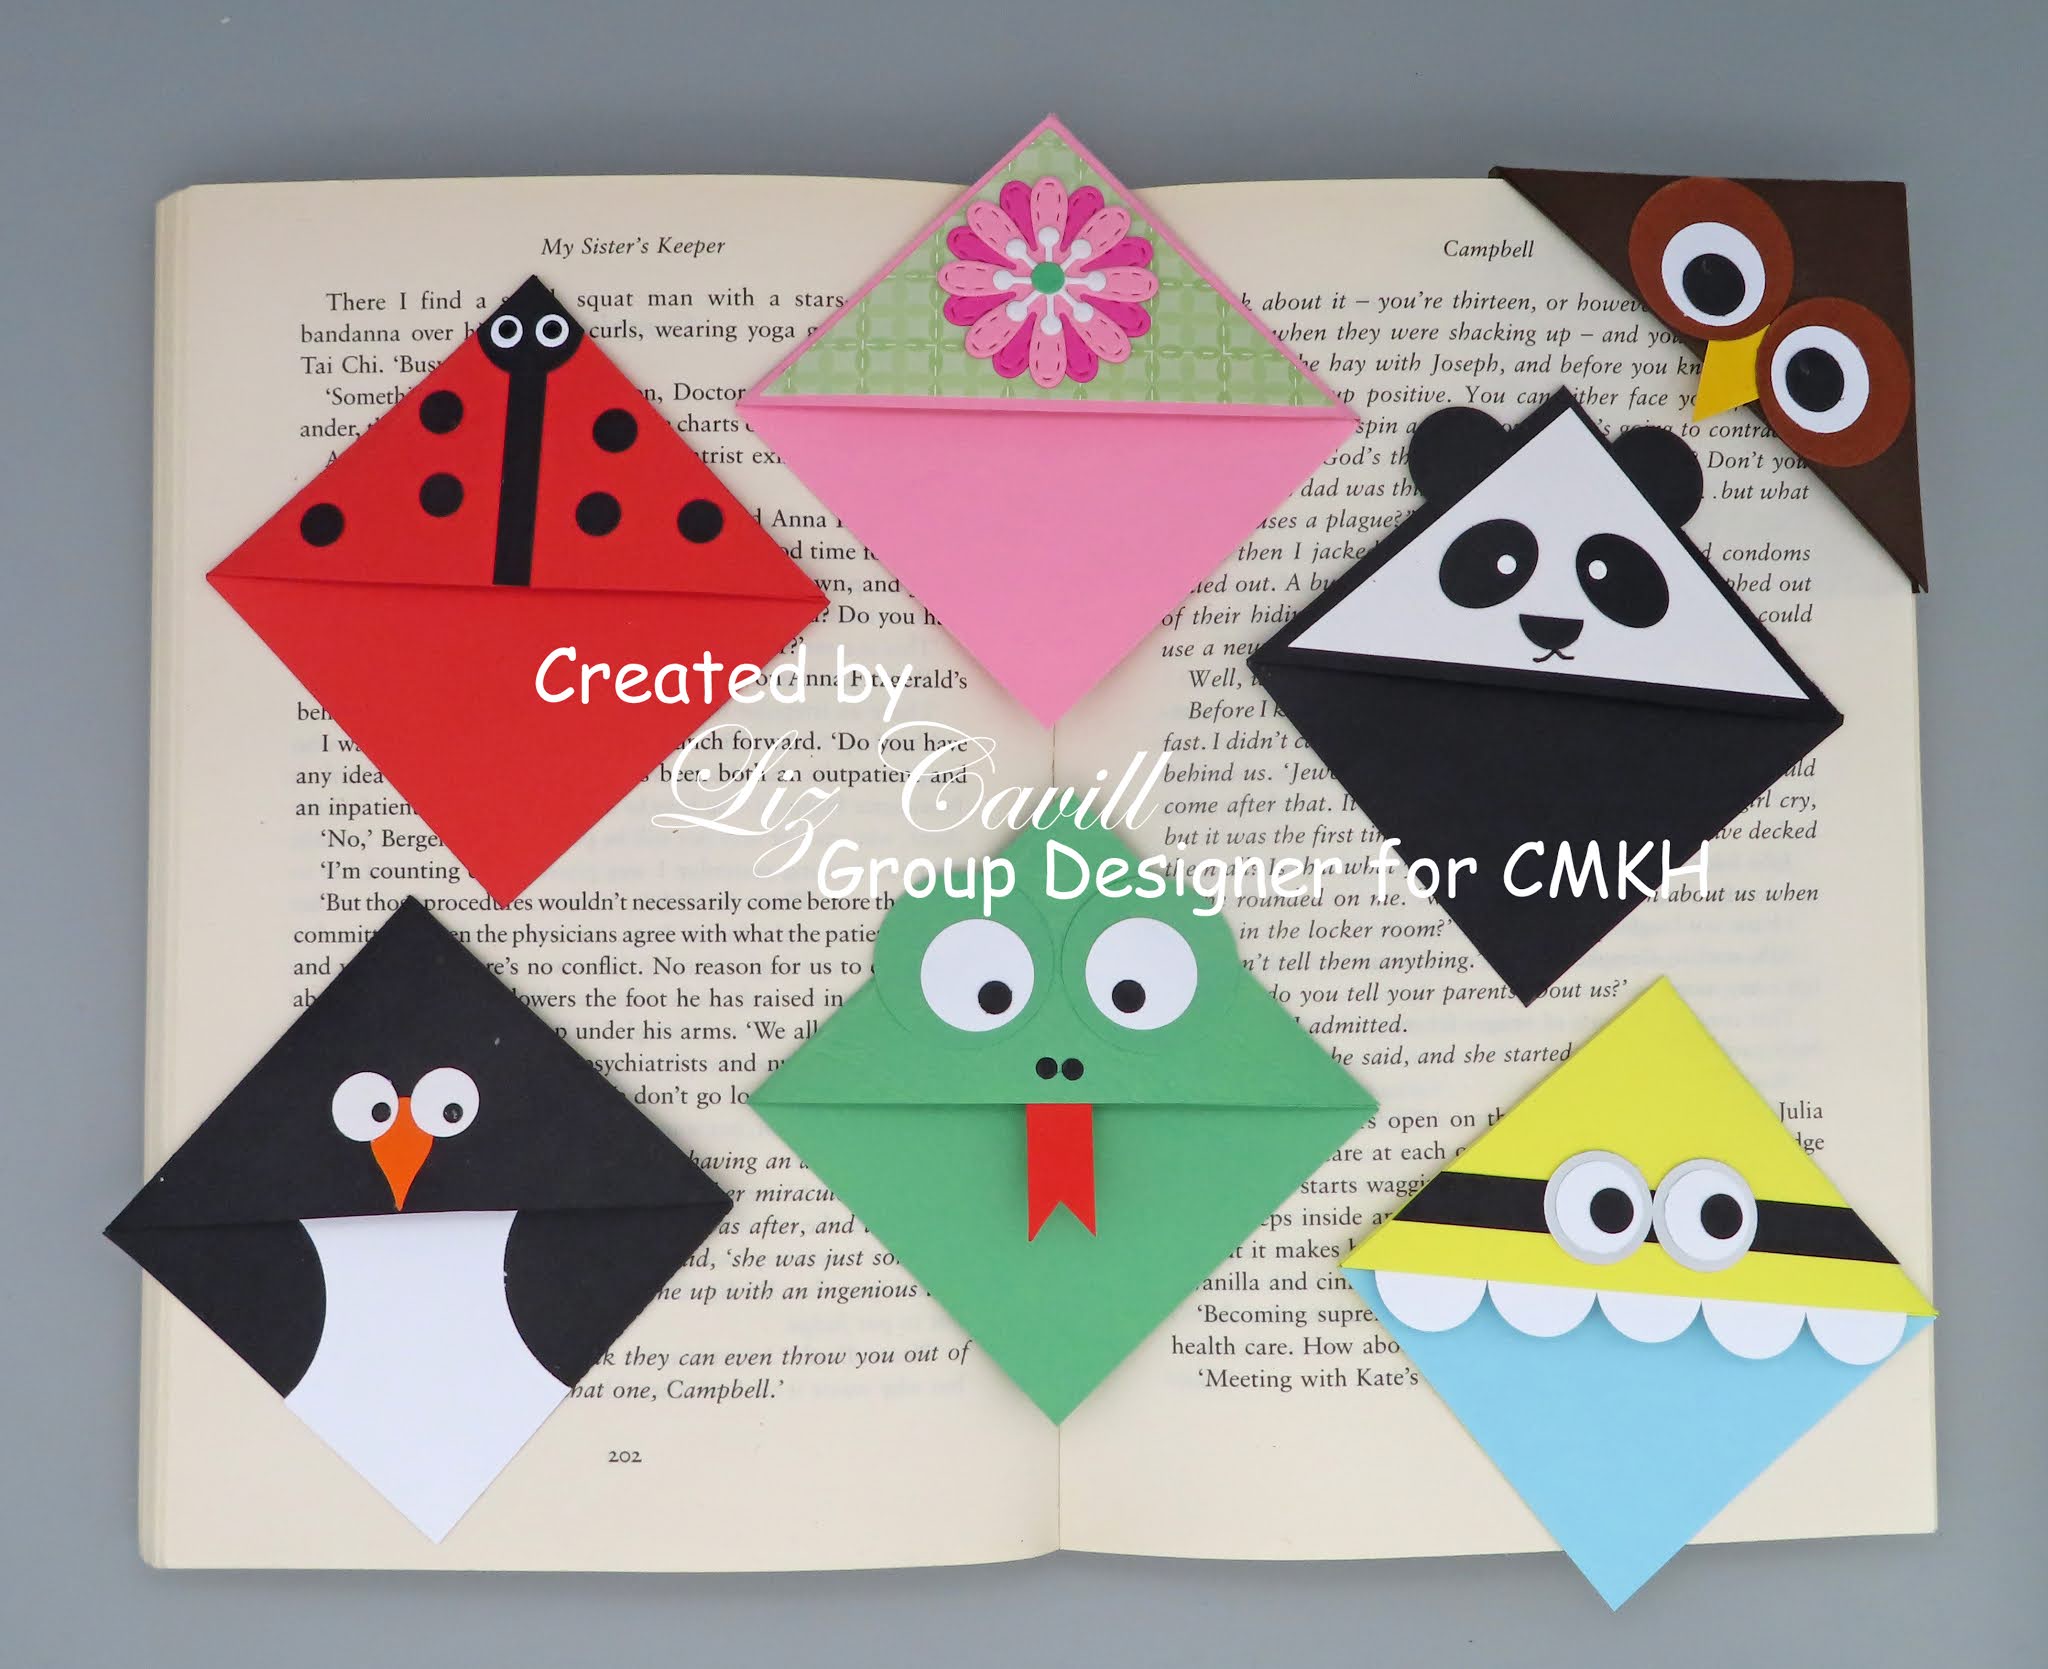
These were made with punches, die cuts and patterned paper. Remember not to add any bulky embellishments which could damage the book when closed.

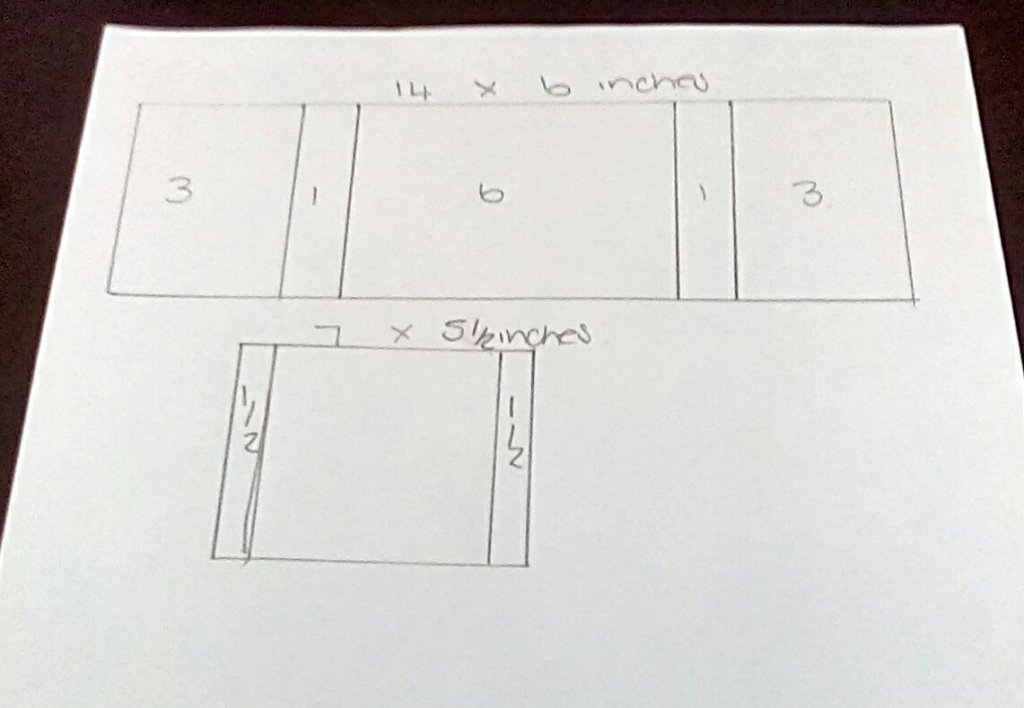
1. Start with a square of card, I used
a 5” x 5” square for the bookmarks above.
Draw lines on the card as shown in my template.

2. Cut off the parts marked in red on the template. (Keep the offcuts for punched shapes or die cuts.) The remaining two lines are the fold lines.

3. Fold along the two lines, as shown. Fold one triangle over the other, ensuring
that they lie flat. Trim the bottom
triangle if necessary.


Personalise the bookmarks by add initials, names or things relating to a hobby. I made these slightly larger with a 6” x 6” piece of card.
Here are two more ideas of bookmarks I’ve made.


Love it Liz, great clear instructions 😍
ReplyDeleteFabulous, what a great idea😊
ReplyDeleteGreat idea, they're so cute and perfect for encouraging children tonread
ReplyDeleteBrilliant idea Liz, and easy for children to make with help. A great idea for a rainy day with the school holidays looming xxc
ReplyDelete