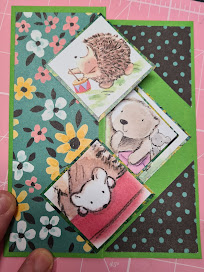
HOW TO CREATE A Z -FOLD POP UP CARD
YOU WILL NEED
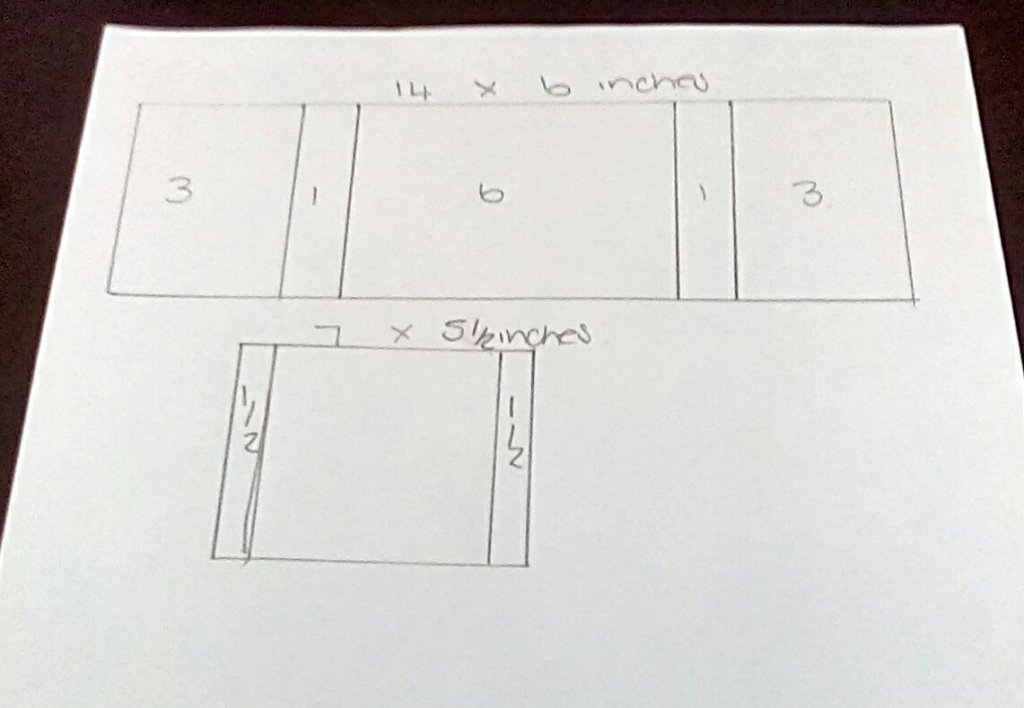
BASE CARD 8 1/2" BY 5 1/2" SCORE AT 2 1/8" AND 4 1/4" TO CREATE A Z-FOLD CARD
FRONT RECTANGLE PANELS 2 MAT LAYERS - 5 1/4" X 1 7/8"
FRONT TOPPERS 2 MAT LAYERS - 1 3/4" X 1 3/4"
FRONT TOPPERS 2 WHITE CARD PIECES - 1 5/8" X 1 5/8"
MIDDLE AND BACK 2 MAT LAYERS - 2 3/4" X 2 3/4"
MIDDLE AND BACK 2 WHITE CARD PIECES - 2 3/4"X 2 3/4" (CUT 1 PIECE DIAGONALLY)
CORNER PANELS 2 PATTERN PIECES - 2 " X 2" (CUT DIAGONALLY)
TO MAKE THIS CARD
1 Stick the 2 MAT LAYERS - 5 1/4"X 1 7/8" onto the first two panels of the z fold card base.

2. Stick the four co-ordinating triangles ( 2 COMPLIMENTARY PIECES - 2 " X 2" CUT DIAGONALLY) to the corners of the back of the card. I found that liquid glue makes it easier to align the triangles to the corners.
3. Stick the square mat (2 3/4" X 2 3/4") centrally between the four triangles. If you are stamping onto the white layers - remember they will be diamond-shaped. I used pre-printed images. Layer the 2 5/8" x 2 5/8" image onto this mat.
4 Take the 2 3/4" x 2 3/4" mat and score diagonally Then cut away approximately 1" away from the tip of one corner ( as shown in the photo above).
5. Stick this cropped diamond onto the inside panel of the z fold. Add the image of your choice (on the 2 5/8" triangle)
6. Stick and layer the two images on the 1 5/8" x 1 5/8" squares onto the 1 3/4" x 1 3/4" mats. Stick the two diamonds onto the front panel. Take care where adding glue. Line the right-hand points up with the inside back panel.
Your card is now complete. Please give this card a go and share your makes on our Facebook Group page. I look forward to seeing your makes very soon.
Best wishes and happy crafting
Geraldine


