Friday 21 July 2023


#weeklypromptfloraandfauna


 You will need…

Cardstock

Tape/glue

Patterned paper

Complimentary dies/die cuts.

Make your card with me …

  1. Cut your cardstock 14 x 6 inches and long the 14 inch side, score at 3 and 1. Flip the card around and score again at 3 and 1.
  2. Your second piece will measure 7 x 5 1/2. Along the 7 inch side, score at 1/2 inch flip and score again at 1/2 inch.

3. To shape the front of my card I used a Tonic Memory book die. You can use whatever shape you have.

For the inner piece, cut your preferred shape and decorate with your choice of patterned paper.

4. Add tape to the 1/2 inch sides of your inner piece and stick to the inside edge of the sides of your card. There will an extra 1/2 to the sides this will enable you to add 3D flowers etc.

5. You are now free to choose your Flora and Fauna stamps, dies, die/cuts to decorate your card.

I chose to decorate mine with many colours of flowers and a fox and some birds cut from black cardstock. I think the black looks quite striking among the pastels. I added some gems too.

Because of the design of this card, it gives a 3D effect but also folds flat in an envelope for posting to your favourite person.

Please tag me in your makes if you decide to make this card, I would love to see your efforts..

Friday 2 June 2023

WEEKLY WORD PROMPT - CREATE YOUR OWN BACKGROUND

 Hello and welcome to the next round of Weekly Word Prompts.  This month we would like you to focus on creating and sharing new projects.  June's first prompt and challenge is to "Create your own Background".

If you are stuck in a crafting rut or have lost your mojo.  Don't worry about creating a card or a project but just play around with inks and spritzes and watch what happens to the paper when you mix up the colours.

To get you going I will share a few simple ideas to create one-layer backgrounds.  These can be developed further but the pictures that I am showing you below will start you off.

I will include photos of the products that I am using to get the different effects.  However, I will not write a complete shopping list so if you need further details please add a comment below.

These are a few of my older art paper pads.  Ideally, pick papers that can take water and ink.  Experiment until you find a paper that works for you and suits your budget.


In the backgrounds below, I tried a mix of spritzes, oxide inks, and watercolour sprays.  Brushos are also good mediums for these types of backgrounds.  The Versafine Clair inks are great for stamping.


For background style number one - use heavier art paper (like Bockingford).  Take a wide brush and add water to the top of the paper.


Add generous lines of watercolour ink to the bottom (dry) part of the paper


Slowly add another brush stroke of water to the bottom of the card.  The inks will move by themselves and begin to merge.


For a bolder effect add a few droplets of ink onto the paper.   Leave to dry naturally.  


Background number two begins life in the same way. This time add droplets of watercolour ink directly to the wettened card.


Watch the colours explode.  The paper will buckle but this is not a problem.


Keep adding colours

Eventually, they will merge together .  Leave to dry naturally.


When the backgrounds are dry - you are ready to start creating cards with them.  Get out your favourite stamps and begin pattern-making.  My top tip would be to stamp on the larger sheets and then cut away the excess.  You will end up with several strips which can be used in a variety of ways.


These simple cards were made from the first batch of backgrounds I inked up.  I cut down the parts that I liked.  Then added a few sequins and a sentiment.


The inked backgrounds that I made at the start of this blog were used together with a large A5 stamp.


I stamped the entire background onto the green background.  I used the colours within the design.  The yellow represents the light.


Then I stamped the toadstools onto the pink background.  Once again I used the colours to represent shading.


Finally, I fussy cut the pink toadstools and layered them onto the green background.  I used a dl die to cut away and frame the section of the design that would work.  All the spare strips will be kept for another card.


Background number three can be achieved on media art paper.


Here I have used a mix of spritzing sprays.  They are sprayed at the same time but you can spray one colour.  Leave to dry and repeat until you achieve the effect you like.  These colours are quite subtle and have a soft sheen.  Making them great for flowers and butterflies.


When the background is completely dry.  Choose a large stamp and your favourite inks.  Ideally use inks that will spread with a spritz of water - such as oxides


Use a mix of colours on the stamp.  Again you do not need to cover the entire page.  You are trying to create a soft barely there design.  Add a spritz of water to the inks and then stamp onto the paper.


Use a heat tool to dry it off or leave it to dry naturally.


Use the stamp and inks again to partially stamp a background onto the card blank.


Now, die-cut a butterfly or a flower from the main background page.  Then adhere to the decorative card blank.


You will end up with a perfectly colour co-ordinated card.


Background number four can be achieved with art papers or smooth cardstock and blending inks.


Take a large stencil and three colours in the same spectrum.


Work on building in the colour in large areas.  Use the lightest colours first.


It is not necessary to cover the entire page because you will cut away the area that you like.


The stencilled background is quite subtle.  In order to show the details of the stamp design.  Try inking with a blend of Versafine Clair Inks.


The stamp design is enhanced by the background stencil.  Try and stick within the same colour family when adding the mats, layers and embellishments.


If inking and getting messy is not for you - then try pre-printed coloured papers such as Craft Consortiums Ink Drops range.


Stamp directly onto the colours of your choice.  The Versafine Ink colours work just as well as a solid black.


Use a simple die to frame the area of the design that you want to use.  It is not always necessary to use the entire stamp or inked page.

Stamp twice onto a matching colour to add interest to the design.  Then fussy cut them out before arranging them onto the background piece.


The contrasting fussy cut pieces can be arranged in the background.  You don't have to stick them directly onto the matching image.


I have tried to incorporate simple ideas with different products so that there is something for everyone. It would be great to see some of you trying something new.  Even if you don't make a card - try making backgrounds with the papers and the art supplies you have in your stash.  They don't have to be perfect.  

The idea of this week's prompt is to have fun and try something new.   


When sharing your projects add the hashtag #weeklywordpromptbackgrounds. Then all the photos can be viewed in one place on the main Facebook discussion page.


Happy crafting!
Love Elisabeth xx


Friday 5 May 2023

FANCY FOLD FIT FOR A KING #WEEKLYPROMPTS

 FANCY FOLD FIT FOR A KING

FLOATING BOOK FOLD EASEL CARD


To mark the occasion of King Charles III Coronation - I have created a Floating Book Fold Easel Card - which I think is a "fancy fold fit for a King".  This idea is based upon a Suspended Book Fold card I spotted on Pinterest by Iced Images. I have adapted this version to sit upon an easel card.


You will need to cut:

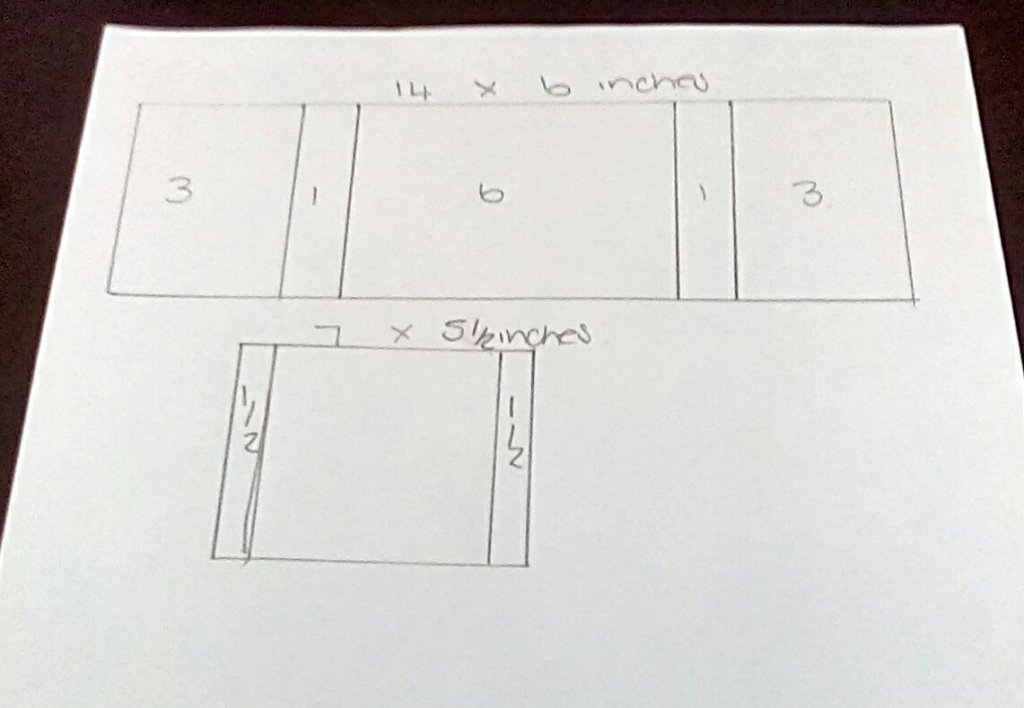
10"x7" card and fold in half to create a 5"x7" card base

1 piece 5"x7" card

1 piece 5"x5" card

2 pieces 2"x6" card


Mats Plain paper

2 pieces 4 3/4" x 3 1/4" Back panel
2 pieces 4 3/4" x 2 1/4" Square panel
6 pieces 1 3/4" x 1 1/4" Two strips
1 piece 4 3/4" x 6 3/4" Easel card base

Mats Patterned paper

2 pieces 4 1/2" x 3" Back panel
2 pieces 4 1/2" x 2" Square panel
6 pieces 1 1/2" x 1" Two strips
1 piece 4 1/2" x 6 1/2" Easel card base


Begin by marking the middle of the 5"7" Back base. Top at 3 1/2" and side 2 1/2".  Make the lines clear to the eye.


Score the two strips at 1 1/2"   3". and 4 1/2".  You may find it easier to number the panels but this is not strictly necessary.


Score the 5"x5" Square panel vertically down the centre at 2 1/2"


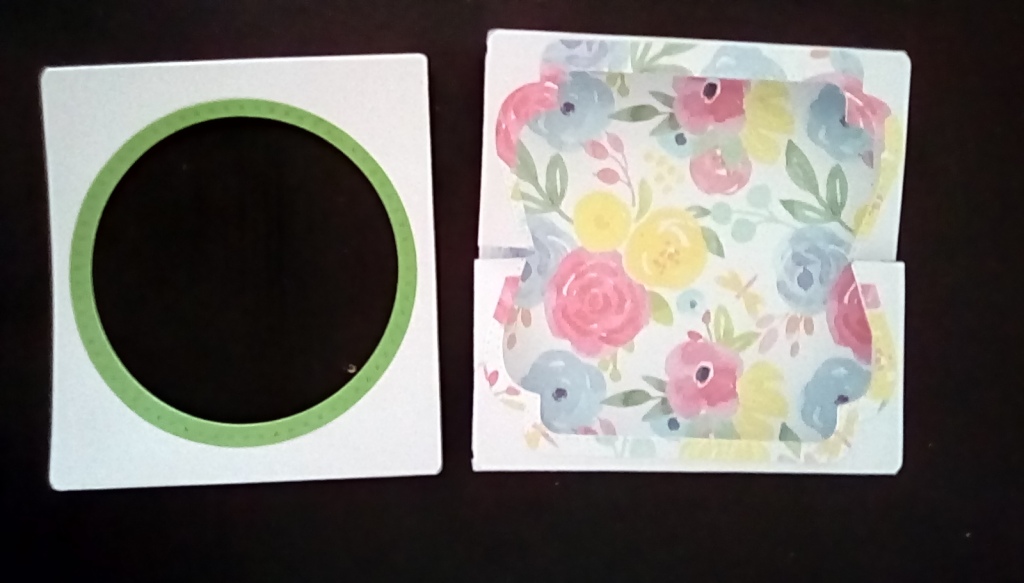
Mat and layer the Back Panel plain and patterned papers 


Adhere them to the Back Panel centrally.  The middle markings will help you to line up the mats and to leave a small gap.


Line up the first of the two strips with the centre mark on the Back panel.  Add glue to panel 5 and secure in place.


Line up the second strip with the first strip, glue panel 5 to the back panel, and secure in place.  The pencil lines are now hidden.


Mat and layer all six plain and pattern pieces,  Then adhere to Panels 1/6/7.


The strips will then look like this.


Mat and layer the plain and patterned papers to the Square 5"x5" panel.


Fold the Square in half then adhere to the strip by lining up the fold with strip panel 8.


Repeat this process on the adjacent side.


Lift the strips away from the base and leave to dry like this.


Mat and layer the plain and patterned papers to the base of the Easel card.  Score a fold line on the front of the card horizontally at 2 1/2".


Add plenty of glue to the lower half of the easel card and secure the lower the half of the Back panel onto it.


Mark where the easel card naturally wants to sit.  Then add a strip of card or a small embellishment to create a stopping point.


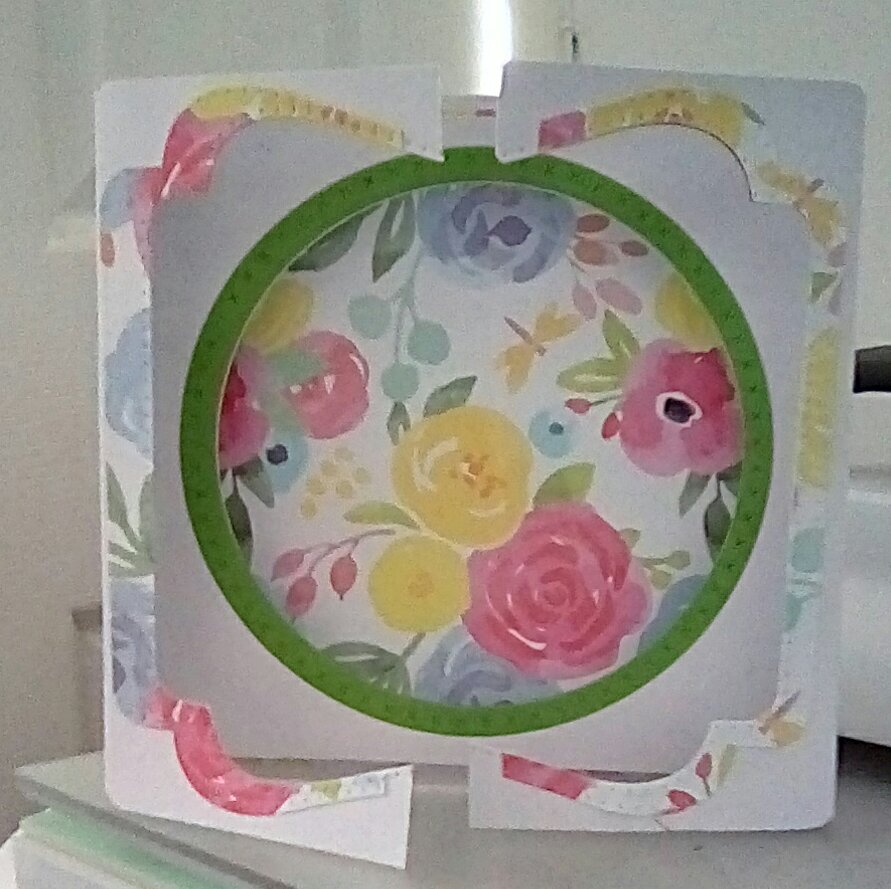
The Fancy Fold Card Base is now complete.


And ready to decorate.


The book fold floats independently of the card base.  Then lies flat within a 5"x7" envelope


Of course, this card can be made as a keepsake to mark today.


Alternatively, with different papers it can be turned into something more historical.


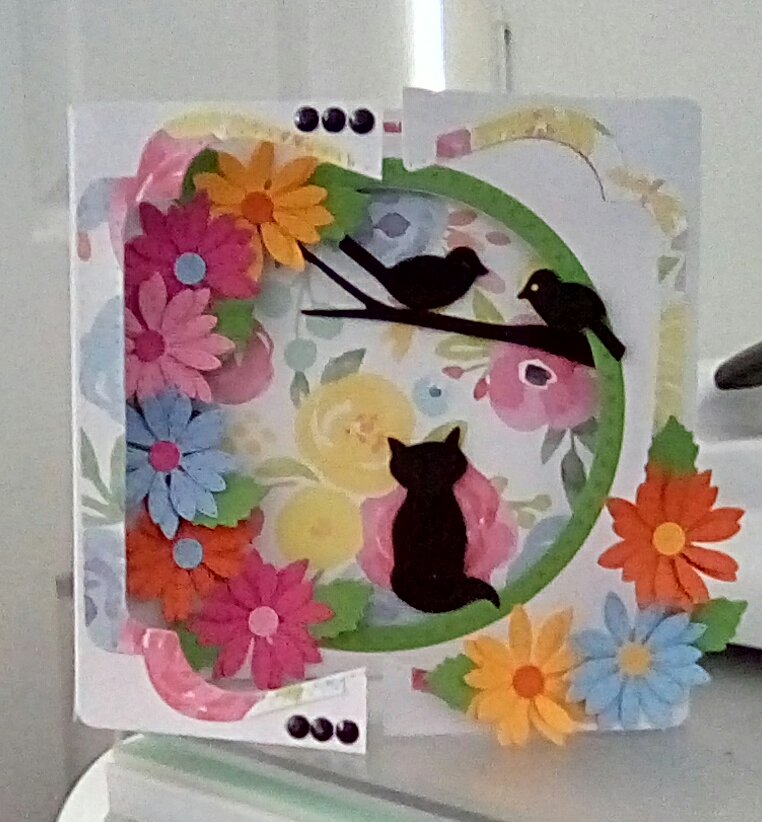
Or simply use your favourite papers and dies to create a floral version.


You are welcome to try this card for the #weeklypromptfancyfold challenge.  Alternatively, revisit one of the many cards we have shared instructions for in our Wednesday Wonders.  Many of the Group Experts have written blog posts or made video tutorials which are easy to follow.  Remember to say where your inspiration came from.

Happy crafting and Coronation Day.

Love Elisabeth xx


#weeklypromptfloraandfauna   You will need… Cardstock Tape/glue Patterned paper Complimentary dies/die cuts. Make your card with me … Cut yo...